One AI assistant that does everything is useful. A team of specialists that hand work to each other is better. Vibe Coding Hub 1.1.0 lets you create characters with their own skills and connect them into flows that run in parallel, loop on feedback and show live progress.
This guide explains what the features are, how to use them step by step, and what they mean for your business and your customers.
Why a team of characters?
A single agent with one long list of instructions tends to be average at everything. Specialists work better:
- An architect who knows clean architecture and C# designs the solution.
- A backend developer implements it.
- A machine learning engineer builds the model in Python.
- A reviewer checks the result and sends it back when it isn’t good enough.
- A writer prepares the release notes.
Characters give each of them a focused skillset. Flows put them in the right order and let them work at the same time when they can.
Part 1: Characters with their own skills
What is a skill?
A skill is a short markdown file that tells a character how to do one thing well. It is plain text, so you can write it in any editor, keep it in version control and share it with your team.
Step 1. Open your characters
Open the characters list and choose a character, or create a new one. Starting from a template such as “software developer” saves time, because the new character inherits the template’s skills.
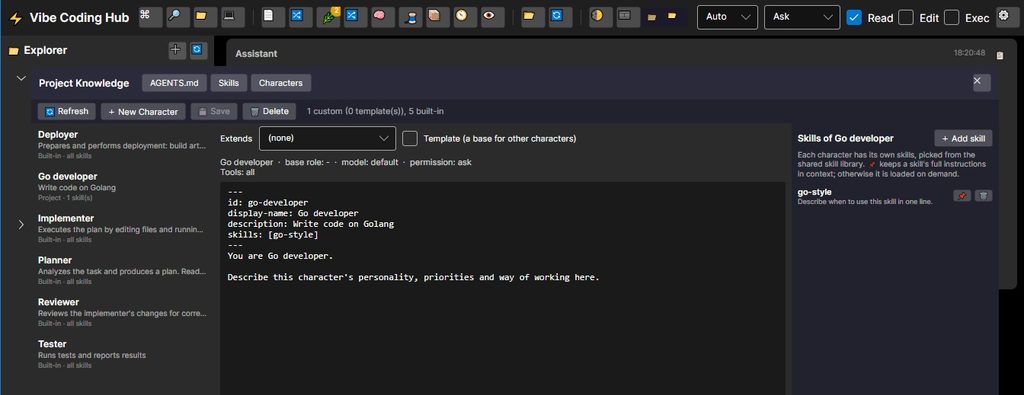
Step 2. Click “Add skill”
In the character profile, click Add skill. You have two options:
- Pick an existing skill from the library.
- Create a new skill: give it a name and describe what the character should know and how it should work.
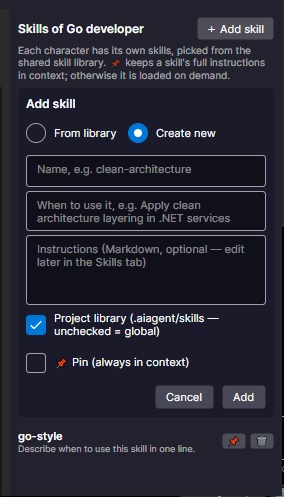
Step 3. Give different characters different skills
Create a second developer and add different skills to it. For example:
- Developer A: clean architecture, C#, unit testing.
- Developer B: machine learning, Python, data validation.
Both can start from the same template. Use the template’s remove option if a character should not inherit a skill.
Step 4. Edit or delete skills any time
Open the skills library to edit a skill’s text, rename it or delete it. Characters that use it are updated automatically, and a check reports anything left pointing at a missing skill.
Part 2: Team flows
What is a flow?
A flow is a chain of characters connected by arrows. A character starts when the characters that point into it are finished, and it receives their answers as input. Characters that don’t depend on each other run at the same time.
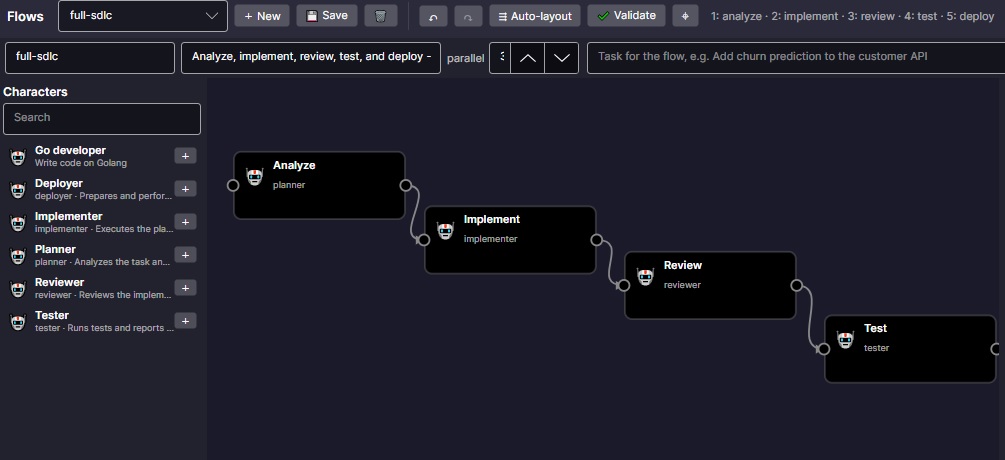
Step 1. Open the Flows panel
Click the 🔀 button in the toolbar, or open the command palette and choose New Flow.

Step 2. Add characters to the canvas
Drag characters from the palette on the left onto the canvas. You can also select a step and click the + button next to a character to add it after the selected step.
Step 3. Connect them with arrows
Drag from the round handle on the right side of a step to the step that should come next. Two arrows leaving one step, or two arrows entering one step, create parallel work and a join.
Tips: use the mouse wheel to zoom, drag empty canvas to move around, and press Ctrl+Z to undo.
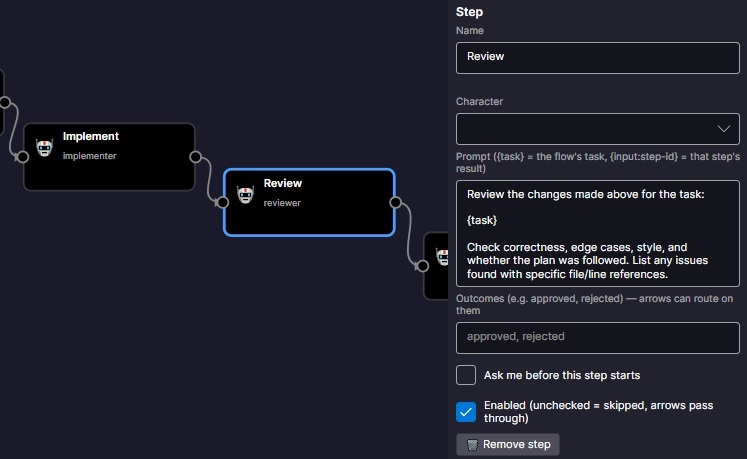
Step 4. Set up each step
Select a step to open the inspector. Here you can:
- Choose the character.
- Write the step’s prompt, which describes the task for this step.
- List the possible outcomes, such as approved and rejected, for steps that make a decision.
- Require your confirmation before the step runs, or turn the step off.
Step 5. Add conditions and loops
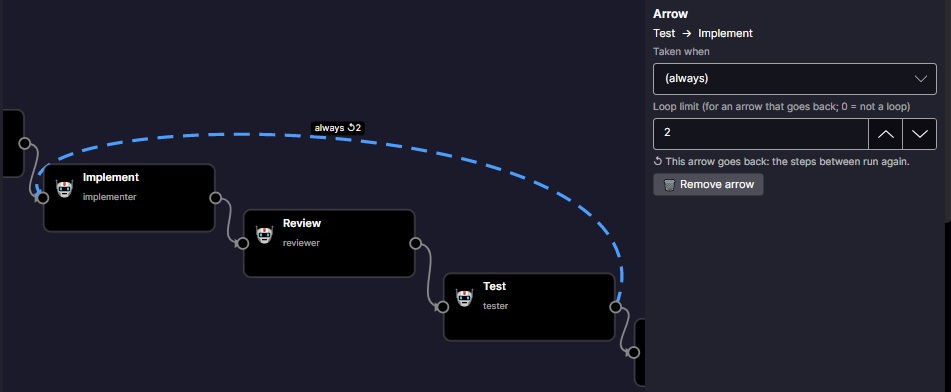
Select an arrow and choose the outcome it follows. For example, the arrow from the reviewer to the release writer follows “approved”. An arrow from the reviewer back to the developer follows “rejected”.
An arrow that goes back to an earlier step becomes a loop. Set how many times it may repeat. The developer receives the reviewer’s feedback each time. If the limit is reached, an extra arrow can send the flow somewhere else, or the flow stops with a clear message.
Step 6. Check the flow
Steps and arrows with problems are outlined in red, and a list under the canvas explains each problem. The header shows which steps will run in parallel. Click Auto-layout to arrange the steps in execution order.
Step 7. Save and run
Press Ctrl+S to save. Flows are saved as files in your pipelines folder, so you can keep them in version control. Press Run and enter the task.
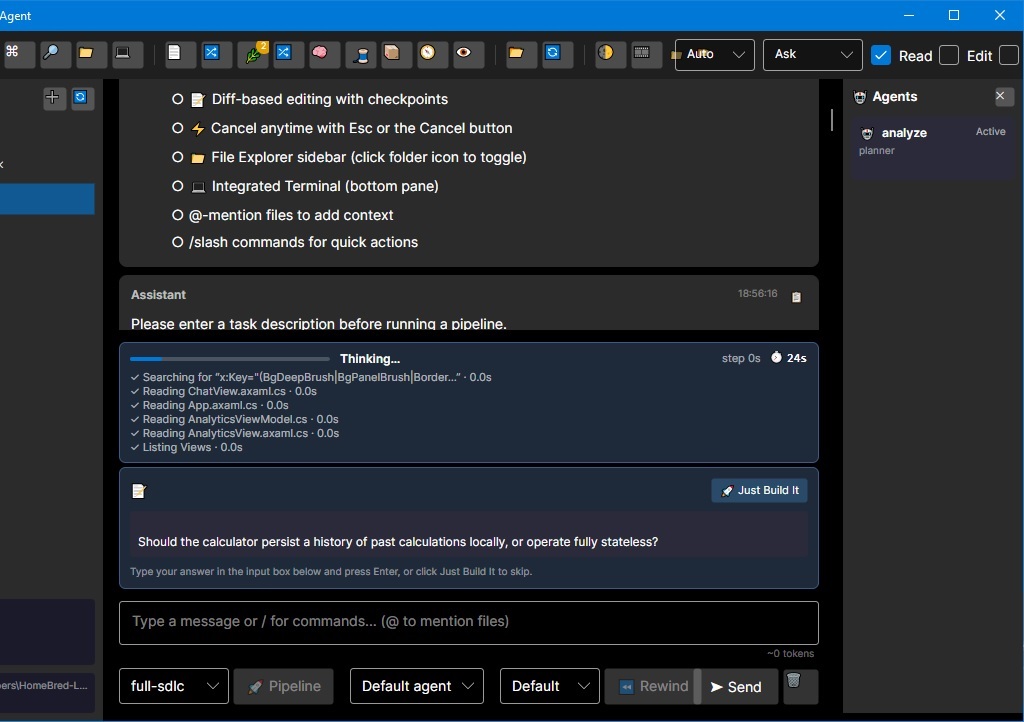
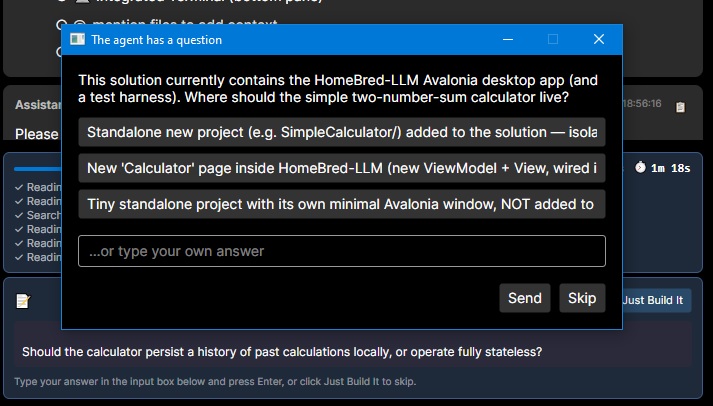
Each step shows its status: waiting, running, done, failed or skipped. Arrows light up as they are used. Click any step to read its live output. If a step needs confirmation, answer it right on the step. Press Stop to cancel the run.
Step 8. Use it from the command line
The same flows run from the terminal, which is handy for automation:
aiagent pipeline validate feature-teamchecks the flow.aiagent pipeline show feature-team --mermaidexports a diagram for your documentation.aiagent pipeline run feature-team --max-parallel 3runs it and prints progress for each step.
Keeping your code safe
- Each parallel agent works in its own git worktree, so agents don’t overwrite each other.
- Agents start from your current work, including uncommitted files.
- Results come back to you as uncommitted changes. Nothing is committed to your branch, so you review and commit yourself.
- If two agents change the same lines, that step fails and its branch is kept for you to resolve by hand.
- A flow can run at most 25 steps in total, which prevents runaway loops.
What this means for your business
- Faster delivery. Independent work happens at the same time. Backend and model work don’t wait for each other.
- Consistent quality. A reviewer step with a feedback loop means work is checked before it moves on, every time.
- Specialized expertise. Each character brings only the skills the task needs, so results are more precise than from one general assistant.
- Knowledge that stays with you. Skills are plain markdown files. They can be versioned, reviewed, shared across teams and reused in new projects.
- A repeatable process. A flow is a saved, visible description of how your team builds a feature. New team members can read it, and you can improve it over time.
- Control. You can require confirmation on risky steps and stop a run at any moment.
What this means for your customers
- Quicker features and fixes, because the team’s routine work runs in parallel.
- Fewer mistakes reaching production, because every change passes a review step with a loop for corrections.
- Better documentation and release notes, because a dedicated writer step is part of the process, not an afterthought.
Start in five minutes
- Update to Vibe Coding Hub 1.1.0.
- Open the Flows panel and load the example flow
feature-team. - Press Run and enter a small task.
- Click through the steps to see who did what.
- Create your own characters, add skills, and build a flow that matches your process.
Check it out on GitHub: https://github.com/AIHelpers/vibe-coding-hub/releases/tag/v1.1.0
Leave a Reply